Fust Survival Tools Tier List
Pickaxe, hatchet, hammer, and Furnace priority for every Friday wipe.
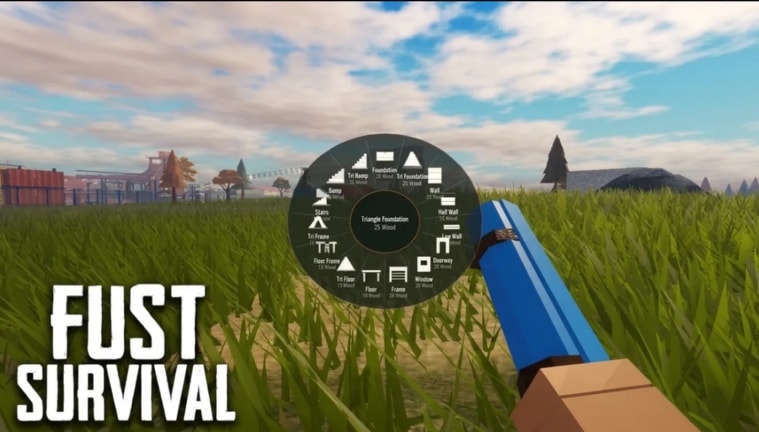
In Fust Survival, tools decide whether your gun tier matters. You spawn on the beach with a rock and a torch, customize your survivor, then face STARTER GOALS: 250 Wood → 100 Stones → craft Building Plan → place foundation → door → Tool Cupboard → Sleeping Bag. Players who chase rifles before pickaxe and Furnace spend the wipe as loot piñatas. This page ranks tool and early station priority for early access, with honest notes that Jimma Studios may retune costs after a patch.
Cross-check recipes in the crafting and resources guide and gun choices on the weapons tier list.
How to read this tools tier list
We are not grading vanity skins. We grade minutes to Metal Fragments, minutes to claimed base, and minutes to Gun Powder. S-tier tools are the ones that unlock the rest of the tech tree. C-tier is anything you craft too early or too late relative to that path.
Press Q for crafting. Early tools live under TOOLS with NO WORKBENCH requirements. Deployables such as Tool Cupboard and Furnace sit under DEPLOYABLES. Explosives come later once Sulphur and Charcoal feed Gun Powder.
S-tier — craft these before you ego peek
Stone Pickaxe
Cost: Wood 200 + Stones 100.
Why S-tier: LMB rock swings get you Stones; the Stone Pickaxe is what opens Metal Ore and Sulphur Ore (yellow crystals) efficiently. Without it, you stall on beach scrap while neighbors light Furnaces. Every serious wipe route treats Stone Pickaxe as non-negotiable.
Priority tip: hit the STARTER GOALS wood/stone counts, place your first foundation path, then finish the pickaxe instead of hoarding cloth cosmetics.
Tool Cupboard
Cost: Wood 1000 (DEPLOYABLES).
Why S-tier: Claims your base, slows decay, and blocks unauthorized build. A pretty honeycomb without a Tool Cupboard is a public works project for raiders. Place it as soon as the door is down and you can afford the wood—do not “wait until the base looks cool.”
Pair with a Sleeping Bag so deaths send you home instead of back to the beach torch.
Furnace
Why S-tier: Converts Metal Ore → Metal Fragments, burns Wood fuel → Charcoal, and handles Sulfur Ore, HQM Ore, and Raw Meat slots. Charcoal + Sulphur is the Gun Powder pipeline (Sulphur 10 + Charcoal 10 → Gun Powder x10). Cold furnaces mean empty magazines and no Timed Explosive Charges.
Light the Furnace the moment you have ore and wood fuel. AFK-cooking while you chop more trees is free progress.
A-tier — the spine of every wipe hour
Hatchet / early wood tools
Wood and Cloth from trees feed Building Plan pieces, Tool Cupboard wood sinks, and Furnace fuel. A reliable hatchet (or best early wood tool available under NO WORKBENCH) is A-tier because everything above burns wood. Starve wood and your cupboard, doors, and charcoal line collapse together.
Gather loop: LMB trees for Wood + Cloth, rock nodes for Stones, then pickaxe for ores. Do not tunnel-vision sulphur rocks before you can smelt.
Building Plan + hammer workflow
Building Plan is the STARTER GOALS gate after 250 Wood and 100 Stones. The hammer (or equivalent build/upgrade tool in your kit) is how foundations, walls, and doors become a real shell. A-tier because raid defense starts with build speed, not with an M4. Soft-side mistakes and missing doors lose more wipes than average gun aim.
Follow How to build a base for honeycomb habits; this tier list only tells you not to skip the tools that make that guide possible.
Workbench 1
Cost (reported): ~500 Wood + 50 Metal Fragments.
Why A-tier: Unlocks the next craft ladder beyond NO WORKBENCH basics. Rushing Workbench 1 before you can feed it is a trap; ignoring it after Furnace is online is how players stay stuck on starter guns forever.
Sequence: Stone Pickaxe → ore → Furnace → first Metal Fragments → Workbench 1 → then evaluate weapons.
B-tier — strong, but only on schedule
Bandages and early sustain
Bandages: 4 Cloth, no workbench, heal 20 HP (5 immediate + 15 over 4s after a 2s apply). B-tier as a tooling priority—not because healing is weak, but because crafting stacks before Tool Cupboard is how players die on the beach with empty pockets. Craft a small stack after cloth income is stable; keep them next to bags.
Extra deployables before cupboard depth
Boxes, secondary bags, and nice-to-have deployables are B when they support a claimed core. They become C when you place décor before door + Tool Cupboard + bag. Privilege the claim, then the convenience.
Early stone dump tools beyond the first pickaxe
Backup gathering tools for teammates are B-tier value on duos/trios. Solos should not craft a museum of near-duplicate tools before Workbench 1.
C-tier — common priority mistakes
- Gun Powder crafts before Furnace fuel discipline — you need Charcoal from wood fuel and Sulphur Ore income; skipping furnace uptime for premature explosive dreams wastes the wipe.
- Fashion kits and crate cosmetics before Stone Pickaxe — Weapon Crates from codes or Game Passes are account-bound cosmetics across wipes in current reports; they do not mine metal.
- Giant base footprints before Tool Cupboard — more walls without claim auth is more grief surface.
- Ignoring map intel — tools get you resources; map and monuments tells you where the risky high-value nodes and monuments sit (harbor, oil rig, airfield, mili tunnels, bunker, dome). Outpost remains the trading / safer hub energy.
Recommended wipe-night tool route
- Spawn, set survivor look, grab rock/torch mindset.
- Chop and mine to 250 Wood / 100 Stones.
- Craft Building Plan, place foundation → door, then Tool Cupboard (1000 Wood) and Sleeping Bag.
- Craft Stone Pickaxe (200 Wood + 100 Stones) if not already done on the way.
- Feed Furnace with Metal Ore / Sulphur Ore and wood fuel.
- Hit Workbench 1 once you have ~500 Wood + 50 Metal Fragments.
- Stock bandages, then shift attention to Gun Powder and the weapons tier.
- Only then plan a raid that your tool economy can finish.
Vanilla vs Modded pacing
Vanilla — normal gather pace; missing Stone Pickaxe hurts for hours.
Modded — faster gather and faster enemy gear. Tools become more urgent because neighbors reach explosives sooner. Do not interpret Modded rates as permission to skip cupboard.
Details on wipe rhythm live on Friday wipe.
Controls reminder for tool work
- LMB — swing / gather
- Q — crafting menu (TOOLS / DEPLOYABLES / EXPLOSIVES)
- M — map
- Gear icon — settings / codes entry
Full binding notes: Controls guide. New players should also skim Getting Started.
Solo vs group tool ownership
Solos — one excellent pickaxe, strict furnace uptime, cupboard first, never leave your only hammer/plan tools stranded outside.
Duos — split wood vs ore routes; one player guards furnace while the other hits yellow sulphur crystals.
Trios+ — assign a dedicated smelter; duplicated starter tools beat duplicated dead guns.
See solo tips for bag chains and low-profile farming that protect tool progress.
Related links
Master tools first. The early-access meta always rewards the team whose Furnace never went cold.
Frequently Asked Questions
Quick answers to the most common Fust Survival questions.
What is the first tool I should craft in Fust Survival?
Prioritize the path that finishes STARTER GOALS, then Stone Pickaxe (200 Wood + 100 Stones) so you can mine Metal Ore and Sulphur Ore instead of stalling on beach rocks.
Why is the Furnace ranked so high?
It turns Metal Ore into Metal Fragments and wood fuel into Charcoal. Without those outputs you cannot reach Workbench 1 or Gun Powder efficiently.
Should I build Tool Cupboard before Workbench 1?
Yes. Claim with Tool Cupboard (1000 Wood) and place a Sleeping Bag before you sink fragments into Workbench 1 and guns.
Do Modded servers change tool priority?
The order stays the same, but urgency rises—faster gather also means enemies reach explosives faster after Friday wipe.