Fust Survival How to Build a Base
Foundations, doors, Tool Cupboard, airlocks, hammer upgrades, and Friday upkeep.
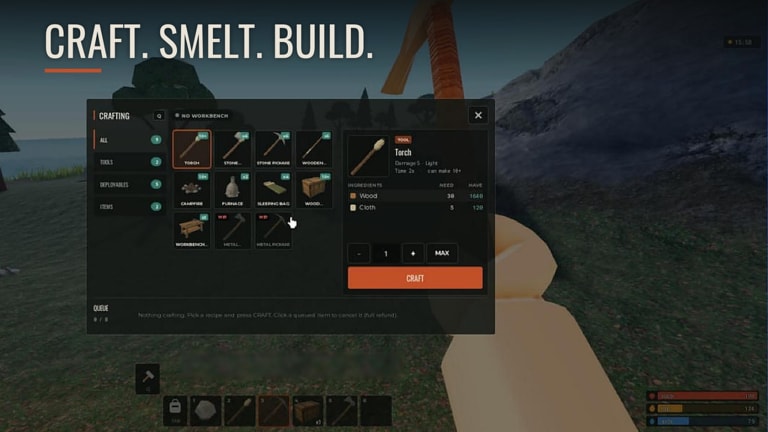
A base in Fust Survival is not decoration — it is your respawn, storage, and raid timer. Until a Tool Cupboard claims the footprint, anyone can build against you and decay will chew soft wood. This guide covers the practical build order from first foundation to a small airlocked shell you can maintain until Friday Wipe.
If you have not finished STARTER GOALS yet, complete Getting Started first. Resource costs assume you already swing trees and rocks efficiently; recipe details live in Crafting and Resources.
Pick the footprint
Scout with M open. Avoid monument parking lots, cliff edges with long sightlines, and choke points between Outpost and popular farms. Ideal early spots have:
- Two tree clusters within a short loop
- At least one rock field for Stones and later ore
- Enough flat ground for foundation plus a second door airlock
- Distance from oil rig / airfield paths so geared players are not always walking past
Solos should prefer compact grids. Clans can claim wider, but upkeep scales with wall count. See Solo Tips before you pour Wood into a mansion.
Foundation → door → Tool Cupboard → Sleeping Bag
- Craft the Building Plan from early NO WORKBENCH recipes.
- Place a foundation (square or triangle — squares are easier to expand; triangles help odd terrain).
- Raise walls and place a door immediately. An open shell is free loot.
- Craft the Tool Cupboard for 1000 Wood under DEPLOYABLES. Place it deep inside, not on the porch. The cupboard claims the area, slows decay, and blocks unauthorized building.
- Deploy a Sleeping Bag behind the door so deaths send you home instead of the beach.
Authorize yourself on the cupboard as soon as it lands. Teammates need authorization too or they cannot build inside the claim.
Airlocks and door discipline
An airlock is two doors with a one-tile buffer. You open the outer door, close it, then open the inner door. Attackers who breach the first door still face a second lock while you wake on the bag. Even a tiny two-by-one airlock beats a single door facing the woods.
Rules that save bases:
- Never leave both doors open while farming.
- Face door swings so peekers cannot spray your core from outside.
- Keep furnaces and Workbench 1 behind the inner door.
- Put junk boxes in the airlock only if you accept losing them in a softside poke.
Hammer upgrades and softside awareness
Use the hammer to upgrade wood into stronger tiers as Metal Fragments allow. Always know which face is softside — raiders path through weak sides first. Upgrade the walls that face common approach angles before you upgrade decorative roofs. Keep spare materials inside so online repairs are possible mid-fight.
Early wood is fine for night one. By mid-wipe you want metal on the raid path toward the Tool Cupboard. Do not upgrade every wall equally; harden the honeycomb that protects TC and bags first.
Upkeep until Friday
Decay slows inside a claimed cupboard radius, but materials still drain. Count wall pieces and keep a buffer of Wood and Metal Fragments in TC-accessible storage. Before long sessions offline, top up upkeep and close both airlock doors. On wipe week, decide whether to invest in another upgrade tier or bank explosives for a last raid — see How to Raid.
Weapon Crates cosmetics persist across wipes, but walls do not. Spend late-wipe surplus on raids or helper kits rather than vanity honeycomb you will lose Friday night.
Starter shell layouts that work
Solo starter: 2x2 square, single airlock, TC centered, bag in core, furnace + Workbench 1 along one wall. Expand honeycomb only after Sulphur income is stable.
Duo shell: Same 2x2 with a second bag and a peek floor once metal is available. Keep the raid path long toward TC.
Quad fortress ideas: Multi-core designs with compound walls appear in community videos — use them only when four players can farm upkeep. The mid-article video shows a quad fortress pattern; shrink it if you are alone.
Build order checklist
- Foundation and sealed door
- Tool Cupboard authorized
- Sleeping Bag in core
- Furnace and early storage
- Airlock second door
- Workbench 1
- Softside upgrades on approach walls
- Optional peek floor / shooting floor
Cross-link monuments for farm loops on Map and Monuments, and keep Controls handy if Building Plan placement feels awkward on mobile or controller. When the shell is stable, return to the Guides Hub or push into raid prep.
Mistakes that lose bases
TC on the roof or outside the honeycomb. Bag outside the door. No airlock on a main road. Upgrading roofs before softside walls. Expanding faster than Cloth and Bandages production. Building on Modded servers next to a clan compound without honeycomb. Fix those before you farm sulphur for C4.
Frequently Asked Questions
Quick answers to the most common Fust Survival questions.
What does the Tool Cupboard do?
It claims your build radius, slows decay, and blocks unauthorized players from building. Craft it for 1000 Wood and place it deep in the core.
Why build an airlock?
Two doors with a buffer stop door campers from walking straight into your TC room. Close the outer door before opening the inner one.
When should I upgrade from wood?
After the claim and airlock exist and you have Metal Fragments to spare. Harden softside walls facing common approaches first.
How do I handle upkeep before Friday wipe?
Keep Wood and Metal Fragments buffered for wall count, top up before long offline sessions, and avoid expanding right before wipe unless you will raid with the surplus.
Is a huge base better for solos?
Usually no. A compact 2x2 with airlock and strong TC pathing outperforms a half-upgraded sprawl. See Solo Tips for footprint advice.